If your Portland kitchen is dealing with slow drains, a dripping faucet, or a garbage disposal that will not run, this guide lays out practical steps and clear decision points. You will get straightforward troubleshooting, safe DIY actions, and a realistic look at kitchen plumbing services, including sink and faucet repair or replacement, garbage disposal work, permit basics, and emergency response. Learn quick actions to limit water damage, how professionals diagnose persistent leaks, and when to call River City Plumbing for licensed, local repair.
1 Common Kitchen Plumbing Problems in Portland and How They Present
Kitchen plumbing failures usually declare themselves with a pattern, not a mystery. A slow, gurgling sink is different from a drip that only shows after you run the dishwasher; the repair and urgency are different too. Noting when a problem appears, what activities precede it, and whether the issue is constant or intermittent will cut diagnostic time in half.
Typical problems and the symptoms you should record
- Clogged or slow drain: water pools before it clears, gurgling from the sink or lower fixtures, backups when the washing machine or dishwasher runs.
- Leaking P-trap or slip joint: visible drips under the sink after use, wet cabinet floor, or loose fitting that keeps recurring despite tightening.
- Dripping or stiff faucet: steady drip from the spout or spray head, or a handle that sticks — usually worn cartridges or seals.
- Supply line failures: sudden, fast flow under the sink and soaked cabinets; old galvanized or rubber lines are common culprits in older Portland homes.
- Garbage disposal hums but will not spin: motor sounds but blade does not turn; often a jam or failed bearings rather than an electrical fault.
- Disposal or sink flange leaks: water at the top of the cabinet, staining around the sink cutout from a failed flange gasket or bad seal on an undermount sink.
- Hidden slab or wall leaks: persistent musty smell, tile discoloration, or unexplained increases in water use; these are the ones that need moisture meters and thermal imaging.
Practical consideration: older Portland houses increase the complexity and cost of repairs. Replacing corroded galvanized supply lines with PEX or braided stainless is the right long-term fix, but it can require crawlspace or cabinet demolition when access is limited, so many homeowners weigh immediate spot repairs against scheduling a full re-pipe.
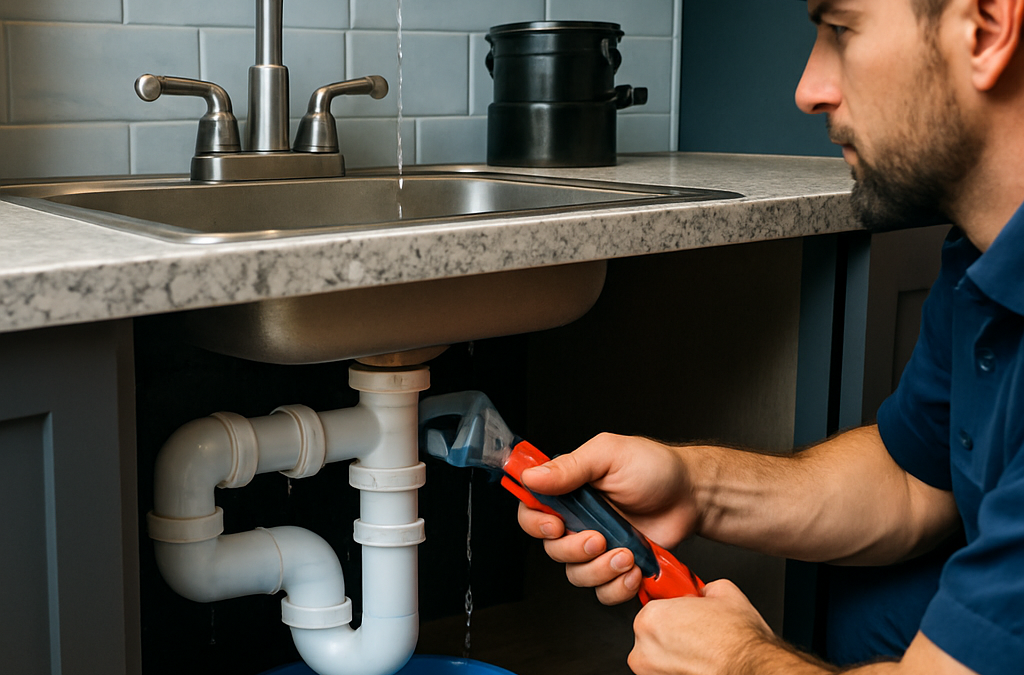
Concrete example: In a Southeast Portland bungalow we inspected, homeowners reported wet cabinetry only after running the dishwasher. Photos showed a slow drip from the dishwasher hose connection that swelled the cabinet floor over months. We replaced the brittle hose with braided stainless, pressure tested the connection, and documented the before/after photos for the owner and their insurer.
What people get wrong: most homeowners tighten a slip nut and assume the leak is fixed. In practice, a recurring leak usually points to a degraded gasket, hairline crack in the trap, or a misaligned flange. Professionals use a dye test, moisture meter, and an infrared camera to find the source — tightening alone is often a temporary fix.
If the problem is intermittent and not causing damage, start by documenting symptoms (photos, timing, and whether a particular appliance triggers it). If you spot continuous water or any electrical risk, treat it as an emergency and get immediate professional help via River City Plumbing kitchen services.
2 Safe Homeowner Actions Before Calling a Plumber
Do these low risk checks first. They often stop active damage or give clear information a technician needs, and they are safer and cheaper than rushing into invasive fixes.
Three practical, safe actions
- Close the isolation valves under the cabinet. Locate the pair of small valves on the hot and cold supply lines and turn them clockwise until snug. Keep a bucket and towels underneath; if a valve is stiff or heavily corroded, stop turning to avoid snapping the stem and creating a larger leak.
- Isolate and time the drain. Plug the sink and fill to a couple inches, then release and note how long it takes to clear. Use a cup or sink plunger to dislodge surface clogs. Do not use caustic chemical cleaners; they can damage P trap seals and garbage disposals and complicate later professional repairs.
- Safely clear a jammed disposal. Cut power at the outlet or the breaker, not just the switch. Use a
1/4 inchhex key in the disposal bottom to back the motor and free obstructions, or push from the top with a wooden dowel to avoid putting hands inside. Try the reset button only after power is off and debris is cleared. For manufacturer guidance see InSinkErator.
Trade off to understand: closing the house main stops all water but disrupts the whole household and can hide intermittent leaks in other branches. Closing cabinet isolation valves is faster and usually sufficient, but if those valves are seized you will need a plumber to avoid making the situation worse.
Concrete example: A Nob Hill condo owner heard a hum from the disposal and tried the reset button with no result. They tripped the breaker, freed a stuck fork with a wooden tool and used the bottom hex key to free the jam; the disposal ran again. Still, a slow drip at the faucet persisted and they scheduled a service call for a worn cartridge and a corroded supply nut.
Stop and call a pro when water continues after closing cabinet valves, when you find significant corrosion or multiple failing parts, if electricity is arcing or breakers trip, or if you see structural water damage. For fast local help see River City Plumbing kitchen services or the emergency line at River City Plumbing emergency.
3 How Professionals Diagnose Persistent Leaks
Professionals recreate the leak conditions and narrow the search systematically — they do not chase every drip at face value. Technicians isolate hot and cold branches, run the exact appliance cycles that trigger the problem, and combine noninvasive sensors with targeted pressure or camera tests to prove where water is entering the structure.
Stepwise diagnostic workflow used on typical kitchen leaks
First pass: visual plus symptom recreation. The tech documents stains and wet zones, runs the disposal/dishwasher/faucet while watching fittings, and times when the leak appears. Intermittent leaks are often appliance-cycle related and require repeated observation rather than a single quick look.
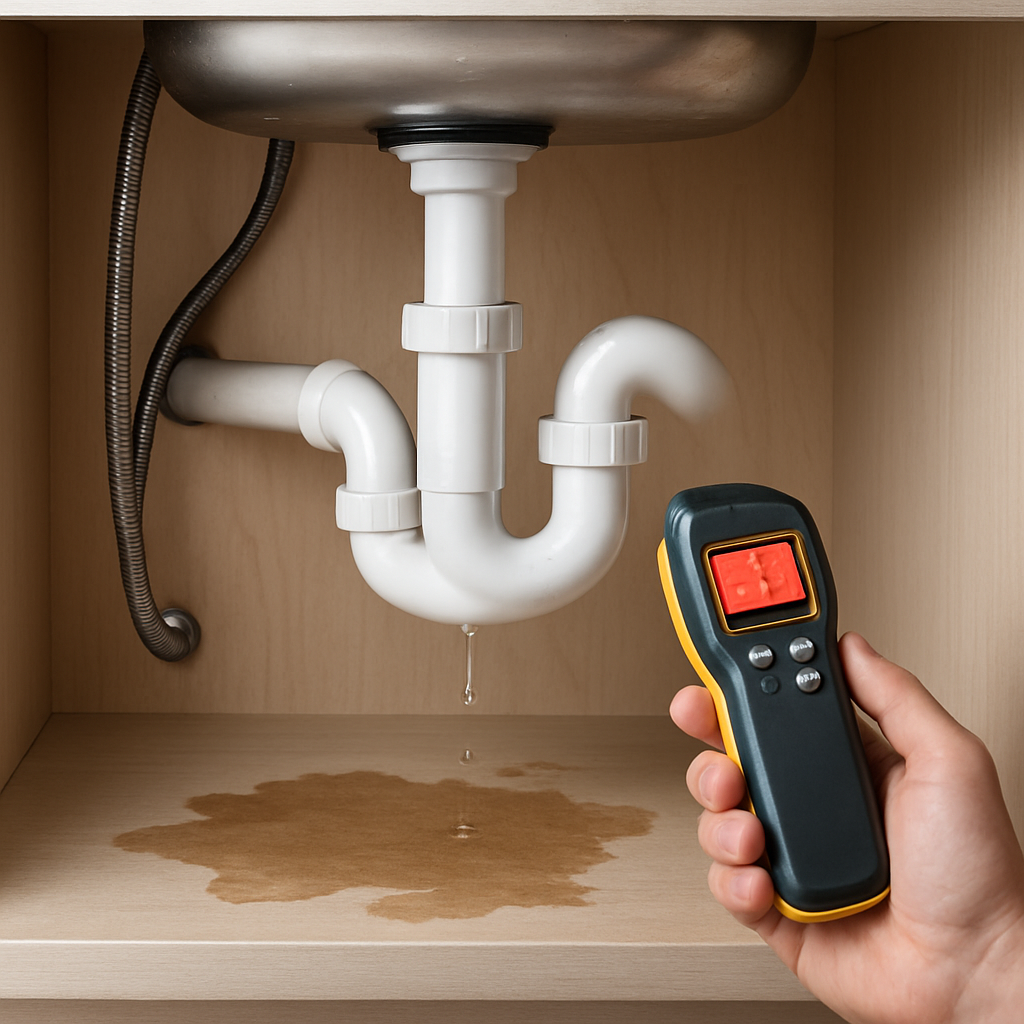
Second pass: noninvasive sensing. Technicians use a moisture meter to map wetness, a thermal imaging camera to find cold streaks from evaporating water, and acoustic amplifiers for pressurized pinhole leaks. Each tool reduces guesswork but has limits: thermal imaging can miss slow leaks behind metal panels, and acoustic methods are noisier in multiunit buildings.
| Tool | What it reveals | Practical limitation |
|---|---|---|
| Moisture meter | Surface and subsurface wetness levels to prioritize cutting or drying | Needs dry baseline; readings vary with material |
| Thermal imaging camera | Cold/wet patterns and hidden damp paths behind walls or under counters | False positives from plumbing insulation or exterior drafts |
| Pressure gauge and isolation test | Pinpointing pressurized supply leaks by isolating branches | Requires shutting lines and can disrupt tenants |
| Drain camera (sewer scope) | Cracks, bellies, or root intrusion in drain lines | Access needed at cleanouts; cannot see behind tight fittings |
| Dye test | Confirms whether a visible stain links to a specific fixture or appliance | Misses extremely slow leaks that disperse before dye collects |
- When pros move to invasive inspection: opening a cabinet back, removing an undermount sink, or cutting a small drywall inspection window happens only after sensors point to a focused spot; blanket demolition is avoided whenever possible.
- Trade-off to accept: noninvasive diagnostics cost more upfront than trial-and-error tightening, but they cut the risk of repeated callbacks and hidden water damage costs.
Concrete example: A River City Plumbing technician responded to a complaint of wet cabinet bottoms after the dishwasher cycle. We ran the dishwasher while watching the junctions, used a moisture meter to map the wet path, then applied a dye at the dishwasher hose. That confirmed a split hose clamp and a slow flange seep; replacing the hose and reseating the flange fixed the recurrence and avoided unnecessary countertop work.
Judgment that matters: homeowners often assume visible tightening is sufficient. In practice, repeated leaks usually mean a degraded component or a pressure issue that needs a different fix. Insist on proof — ask your technician for the test they ran, photos or thermal images, and a clear quote for the repair versus a temporary patch.

Next consideration: before authorizing work, ask whether the fix will require a permit or reconfiguration that affects adjacent systems (dishwasher hookups, venting). If the technician cannot produce test evidence or a clear scope, treat the job as incomplete and get a second opinion.
4 Sink and Faucet Repair or Replacement Options
Direct approach first. For most kitchen sink trouble there are four practical pathways: targeted repair, reseal and reinforcement, partial replacement, or full fixture upgrade. Choose by balancing immediate risk, access constraints under the cabinet, and whether you want a long term solution or a quick stopgap.
Four realistic options and when each fits
- Targeted repair – low invasiveness: Replace a worn cartridge, tighten or swap a slip nut, or change a brittle supply line. These fixes are fast and inexpensive when the underlying components are accessible and the sink cutout and countertop are in good condition.
- Reseat or reseal – moderate risk: Reseating a sink flange, replacing the rubber gasket on an undermount, or reapplying plumber grade sealant can stop leaks without moving the sink. This works when the sink itself is sound but seals have failed – note that undermount reseals are temporary if the undermount clip or counter substrate is rotted.
- Partial replacement – targeted swap: Swap the faucet or garbage disposal without changing the sink. This is the right middle ground when the sink is fine but fixtures are failing, or when you want a different faucet spread or a higher capacity disposal.
- Full replacement or rework – highest scope: Replace the sink and faucet together, modify the countertop, or relocate the drain. This solves chronic problems and modernizes functionality but commonly triggers permits and additional trades – countertop template, cut, and reinstall add labor and time.
Important tradeoff: Quick repairs look cheap up front but often delay the inevitable. A failing supply line or corroded valve that gets patched can leak behind the cabinet and cause mold. If access will require removing a finished cabinet or cutting the countertop later, accept the higher up front cost for a single, certified replacement.
| Option | When DIY is reasonable | Typical Portland cost and time |
|---|---|---|
| Targeted repair | Visible cartridge, accessible slip nuts, braided supply lines | $150 – $400, same day |
| Reseat or reseal | Undermount with intact sink and dry cabinet base | $200 – $600, 2-4 hours |
| Partial replacement | Swapping faucet or disposal without altering counter | $250 – $900, 1 day |
| Full replacement or rework | Sink cutout change, undermount removal, drain relocation | $350 – $1,500+, 1-3 days plus permits |
Concrete example: In a Portland bungalow the P-trap leaked repeatedly after homeowners tightened the nut. We found a hairline crack and a warped flange seat from previous reseal attempts. Rather than repeated repairs we replaced the trap, installed a braided supply line, and resealed the flange properly. The job took half a day and stopped callbacks – it also avoided the bigger cost of replacing a water damaged toe kick the next season.
Judgment call to make now: If your sink is undermount and the leak shows at the flange, assume the work will at minimum require a careful reseal and often a countertop rework. Cheap faucets can mask design problems – spending more on a serviceable cartridge and standard fittings pays off. For licensed, code aware work and help with permit questions see River City Plumbing kitchen services and Portland permit guidance at City of Portland BDS.
5 Garbage Disposal Repair, Replacement, and Upgrade Guidance
Straightforward reality: most disposal problems fit into three categories – mechanical jam, electrical failure, or seal/leak at the flange. Address the correct category first; chasing symptoms wastes time and risks making the underlying issue worse.
Safe troubleshooting sequence
- Cut power completely: shut off the dedicated breaker, not just the wall switch.
- Reset and inspect: press the manufacturer reset, but only after power is off inspect by eye for foreign objects through the sink opening using a flashlight.
- Free a jam properly: use a
1/4 inchhex key in the bottom-access slot or a wooden dowel from the top; never put a hand inside. - Check the wiring and switch: if reset and jam clearing do not restore operation, look for loose conduit or melted insulation and stop if wiring looks compromised.
- Test for leaks: run water and watch the sink flange, discharge elbow, and dishwasher connection for weep or spray; tight fitting can hide a failed gasket.
Trade off to weigh: repairing a jam is cheap and often effective, but recurring jams or grinding noises usually indicate bearing or motor wear. In those cases a replacement prevents a near term failure that can foul drains and create water damage.
Product guidance that matters: for households that run disposals heavily or have frequent food waste, consider a higher torque, insulated model such as the InSinkErator Evolution line for quieter operation and longer life. For budget conscious owners who still need torque, Waste King models offer good value. Choose horsepower and continuous feed features based on typical use rather than marketing alone.
Installation considerations specific to Portland kitchens: undermount sinks need careful flange sealing and sometimes countertop rework; dishwashers must have correct hose clamps and air gap or high loop as required by local plumbing practice. Hardwiring a disposal may involve a permit or electrical code checks – coordinate with your plumber to avoid rework. For permit info see City of Portland plumbing guidance and for local service options visit River City Plumbing kitchen services.
Real case from the field: In an inner northeast Portland rental the disposal hummed and tripped the breaker. We removed a stuck ceramic shard, found frayed wiring at the switch loop, and recommended replacement for safety and reliability. Replacing the unit and redoing the switch solved the electrical risk and stopped repeat tenant calls.
If the disposal hums and resets fail, treating it as an electrical problem rather than a mechanical one is safer and more cost effective in the long run

Next practical decision: if your disposal has intermittent noise, frequent jams, or any sign of electrical damage choose replacement. If the failure is a one off jam and wiring checks clean, a repair and preventive coaching on what not to put down the drain will buy time without unnecessary replacement.
6 Portland Code, Permits, and When a Licensed Plumber is Required
Straight answer: in Portland, small faucet swaps are often straightforward, but any work that changes how water flows or drains through the wall or floor usually moves the job from DIY into the permit-and-licensed-plumber category.
Work that commonly triggers a permit or needs a license
- Relocating the drain or tailpiece: cutting a new hole, moving the trap, or rerouting the waste line beneath the cabinet.
- Changing venting or sanitary connections: reconfiguring the vent stack, adding a new fixture tie-in, or altering the building sanitary path.
- Altering sink mounting or countertop structure: removing or cutting a countertop for an undermount or larger bowl if it affects the sink flange seating.
- Pressurized supply work: tapping, extending, or replacing the potable main or hidden branch that supplies the kitchen.
- Commercial or multi-unit installations: required backflow prevention, high-capacity fixtures, or work in shared systems almost always requires licensed technicians and permit oversight.
Practical limitation: pulling a permit takes time and often adds inspections. That increases cost and schedule compared with a simple cartridge swap, but failing to pull a required permit can force undoing work, trigger fines, or create problems during a home sale or insurance claim.
When a licensed plumber is required: Oregon plumbing rules and Portland BDS expect licensed professionals for work on potable water systems, waste and vent reconfiguration, and any alteration that penetrates structural elements. Licensed plumbers also carry the liability coverage and inspection history that lenders and insurers expect for major repairs.
Concrete example: A homeowner replaced a top-mount sink with an undermount to modernize the counter. The installer cut the countertop and reseated the flange without a permit. During a later sale inspection the buyer's inspector flagged the unpermitted countertop modification and a poor flange seal; the owner had to hire a licensed plumber, pull retroactive permits, and redo the reseal to satisfy the inspection. The redo cost significantly more than doing it correctly the first time.
Judgment that matters: trying to save on upfront labor by skipping a licensed installer rarely pays off. In practice, certified plumbers avoid common inspection failures (wrong fittings, missing anti-siphon measures, improper clamps) and they document the work so you have proof for insurance and resale. If a repair touches hidden supply, venting, or structural material, budget for a permit and call a licensed pro.
Next consideration: if you are unsure whether a job crosses the permit threshold, get a licensed plumber to evaluate and provide a written scope that states whether permits are required before work begins; that single document avoids most downstream surprises.
7 Emergency Response, Water Damage Mitigation, and Preventive Maintenance
Immediate priority: stop the flow, protect circuits, and limit what gets soaked. In a kitchen leak the fastest mistakes are waiting and hoping it will slow down or running a trash pump without documenting the scene. Act to reduce structural damage first; documentation and professional mitigation come next.
Emergency triage sequence
- Isolate the source: close the nearest shutoff at the fixture or the domestic shutoff if the local valve will not stop flow. Use a wrench only if the valve will not turn by hand and you understand the risk of breaking an old valve.
- Protect electricity: cut the breaker for the affected kitchen circuits if water is near outlets, switches, or the disposal. Do not touch wet switches or appliances.
- Contain and document: move dry items out, place buckets and towels to limit spread, and photograph everything before you remove materials. Photos are evidence for insurance and useful to the technician.
- Call for prioritized help: contact a 24/7 emergency kitchen plumber such as River City Plumbing via River City Plumbing emergency. Tell them what you isolated and what remains wet.
- Limit invasive mitigation: if standing water is significant call a restoration contractor after the plumber isolates the leak; rapid extraction limits mold but improper demolition can void insurance.
Practical tradeoff: rapid drying reduces mold but can destroy evidence an insurer needs. Photograph before you touch, then act. If an insurer requires an inspection, tell your plumber to document diagnostics and temporary repairs with photos and written notes.
Concrete example: a Pearl District property manager found a slow drip saturating the toe kick overnight. They shut the kitchen branch at the meter, flipped the breaker, took photos, and called River City Plumbing. The crew isolated a failed braided supply connector, made a temporary stop, and advised a restoration crew for drying; the documentation sped the insurance approval for repairs.
Preventive maintenance that actually reduces emergencies
- Quarterly visual check: look under the sink for new stains, soft cabinet bottoms, or pooling after appliance cycles. Catching a weep early avoids cabinet rot.
- Annual professional inspection: have a licensed plumber pressure test supply branches, check slip nuts and trap integrity, and scan for hidden moisture with a thermal camera. This finds pinhole leaks before they become emergencies.
- Replace aging supply lines: swap rubber lines every 5 to 8 years; braided stainless or PEX are longer lasting and reduce rupture risk. Budget replacement when cabinets are open for other work.
- Install water detection and automatic shutoffs: alarms under sinks and smart shutoff devices limit run time on leaks. Expect false alarms and battery maintenance; they are mitigation, not full protection.
- Routine disposal and drain care: run cold water while using the disposal, avoid grease, and schedule occasional professional drain cleaning to prevent backup-related overflows.
Judgment that matters: many homeowners treat leak alarms as a one time purchase and then forget maintenance. In practice, the best ROI is combining alarm devices with a yearly plumber inspection and scheduled replacement of vulnerable parts. That mix reduces emergency calls and stops costly secondary damage.

Next consideration: if the leak involved a pressurized line or electrical damage, arrange for a licensed plumber and possibly an electrician to provide a written scope and timeline before cleanup begins; that document is the single thing that avoids rework and costly denied claims.
8 Pricing Transparency, Estimates, and What to Expect from River City Plumbing
Straight answer: River City Plumbing bills in clear parts: a diagnositc/service fee, labor (either flat-rate for common repairs or hourly for complex work), parts at cost plus a disclosed markup, and an after-hours emergency premium when applicable.
How estimates actually work in practice. Technicians usually provide a two-step estimate: a diagnostic scope tied to the service call, then a firm written quote once the source is confirmed. Expect the diagnostic fee to be applied toward the repair if you proceed; that avoids surprise billing but not surprise scope.
Typical pricing components you should see on an estimate
- Service/diagnostic fee: covers arrival, basic testing, and documentation — usually billed upfront and applied to the job if you authorize work.
- Labor: either a flat-rate for defined tasks (cartridge swap, P-trap replacement) or hourly for troubleshooting, with clear hourly caps.
- Parts and materials: listed by brand and model, with any markup shown as a percentage or separate line item.
- Permit and inspection costs: if the job needs a permit, these fees should be listed or explicitly called out as excluded.
- After-hours/emergency premium: a defined multiplier or surcharge for nights/weekends, stated before authorization.
Practical tradeoff: choosing the lowest appointment price often trades short-term savings for higher long-term cost. Cheap initial quotes commonly omit permit fees, use generic parts with no warranty, or treat diagnostics as a separate bill. Ask which line items are estimates versus fixed.
Concrete example: A homeowner in Sellwood called after a persistent under-sink leak. River City Plumbing charged the diagnostic fee, ran noninvasive tests, and delivered two written options: a temporary reseal (short timeline, limited warranty) and a full trap and supply-line replacement with a 1-year labor warranty and permit handling. The owner chose the permanent repair with a payment plan; photos and the permit record were uploaded to the homeowner portal the same day.
Judgment that matters: demand an itemized written estimate before work begins and verify whether permit pulls are included. If a contractor refuses to list parts by brand or to document required permits, treat that as a red flag — cheaper now can cost far more at resale or if an insurer denies a claim. For Portland-specific permit questions see City of Portland plumbing guidance and for service details visit River City Plumbing kitchen services.
Payment and financing: River City Plumbing accepts common payment methods and can offer third-party financing on larger replacements; always confirm APR, payment schedule, and whether financing affects warranty coverage.
Next consideration: before you schedule work, ask for an arrival window, what will be tested during the visit, and whether the technician can provide on-site financing paperwork — that short checklist prevents the most common billing disputes.