

Top 10 Common Plumbing Issues Portland Homeowners Face — and How to Fix Them
Plumbing issues are one of the most common headaches Portland homeowners face, especially in older houses with galvanized lines, cast iron sewers, and mature street trees. This guide lists the top 10 problems you are likely to encounter, gives safe DIY troubleshooting where appropriate, explains when to call a licensed plumber, and offers Portland-specific prevention tips and realistic cost ranges. Read on to learn quick checks you can do yourself and the red flags that justify a pro call before small problems become big repairs.
1. Clogged Kitchen Drains and Grease Build-Up
Direct point: Grease and food solids are the single most frequent cause of kitchen drain trouble in Portland homes and they rarely fix themselves. Symptoms to watch for are slow draining, water pooling in the sink basin, and gurgling noises when other fixtures run.
Common causes and why grease is different
Grease is liquid when warm and becomes a solid film as it cools inside pipes. That film collects coffee grounds, rice, fibrous veg, and soap scum and forms stubborn blockages in the P-trap or farther down the line. Older cast iron and galvanized fittings common in many Portland neighborhoods roughen over time and trap grease faster than smooth plastic.
Safe DIY troubleshooting steps
- Basic check: Remove the sink strainer and test with a cup of water to confirm where the slowdown starts.
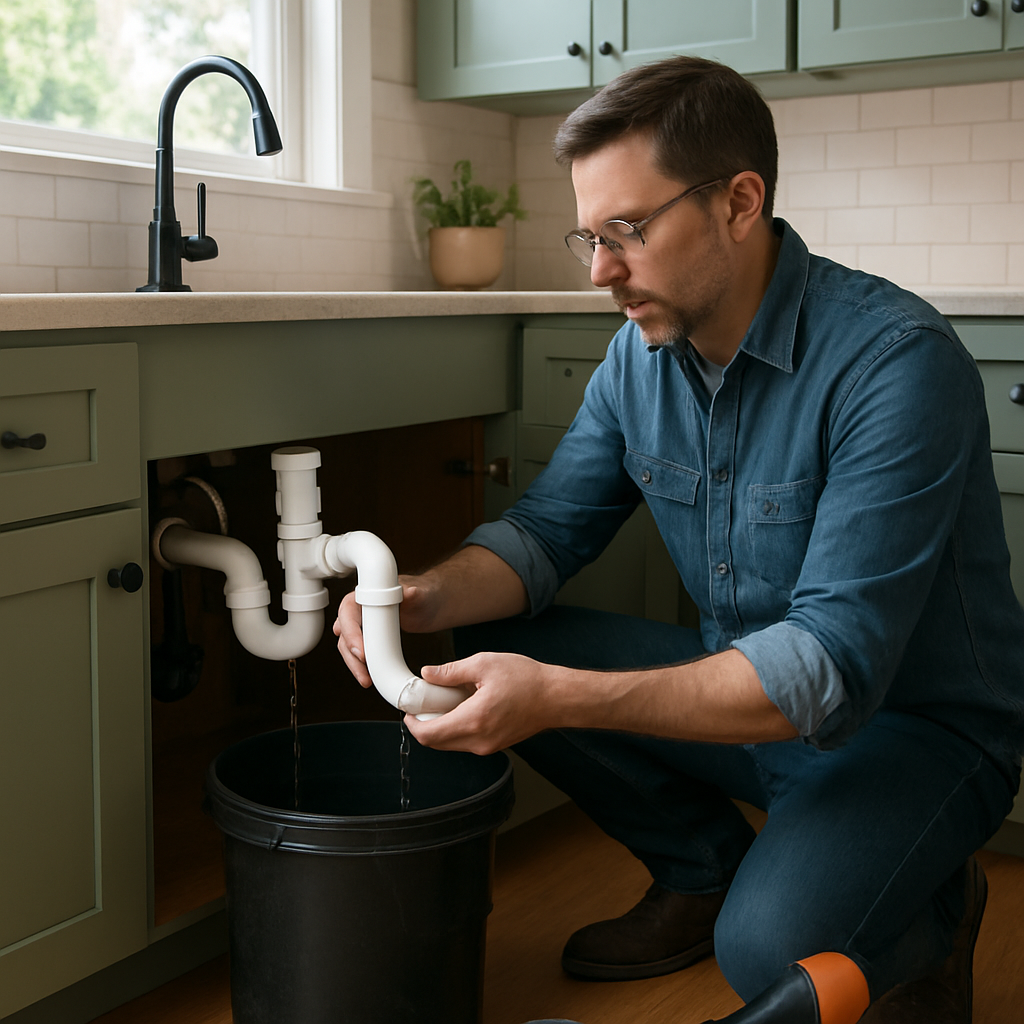
- P-trap clean: Put a bucket under the trap, loosen slip nuts with channel locks, remove and clean the trap. This clears most food clogs and is safe for any pipe material.
- Hand auger first: Use a 1.5 inch drum auger or 3 8 inch hand snake such as
Ridgid PowerSpinfor deeper kitchen clogs. Feed gently to avoid pushing a soft grease ring further down. - Flush strategy: After mechanical removal, flush with very hot water and a biodegradable degreaser made for kitchen use. Enzyme cleaners are a slower but safer maintenance option for old pipes.
Do not pour hot grease down the drain. Do not use caustic drain cleaners on older cast iron or galvanized pipes.
When to call a licensed plumber: If the same sink clogs repeatedly within weeks, if multiple fixtures back up, or if you smell sewage or see slow drains across the house. These signs indicate a deeper line issue that needs camera inspection, rooter work, or hydro-jetting.
Tradeoff to understand: Mechanical snaking can clear the immediate obstruction but sometimes compacts greasy residue and moves it farther down where it re-hardens. Hydro-jetting removes the coating but requires a professional because high pressure can uncover weak or corroded joints in older sewer runs.
Concrete example: A Southeast Portland renter cleared a gurgling kitchen sink by removing the P-trap and pulling out a wad of congealed cooking oil and wet wipes. The job took 20 minutes and cost under $20 for gloves and a bucket. The homeowner then scheduled a hydro-jetting service after the sink clogged again three months later and discovered grease packed into a lateral joint.
Local action: If DIY steps fail, call a licensed Portland plumber who can scope the line and recommend hydro-jetting or repairs. River City Plumbing offers 24 7 response and main-line services at Portland Plumbing Services | Emergency Plumber | River City Plumbing.
2. Slow or Clogged Bathroom Drains (hair and soap scum)
Direct point: Slow bathroom drains in Portland usually come down to hair mixed with soap scum creating a dense, glue-like plug at the trap or just below the drain. This is simple in cause and stubborn in practice — the fix is mechanical removal plus a change in routine, not a miracle chemical.
Common signs and where the clog lives
Signs: slow draining shower or tub, water pooling around the drain, gurgling from nearby sinks, and a recurring musty odor. Small, surface slowdowns are almost always in the pop-up or P-trap; repeated or simultaneous slowdowns across fixtures suggest the clog is further down the stack.
Safe DIY checklist (what actually works)
- Remove the cover: unscrew or pry up the drain plate and clear visible hair with needle-nose pliers or a Zip-It tool.
- Use a hand auger: a 1/4 to 1/2 inch drain snake will reach beyond the trap; feed slowly and pull up – you want to extract, not pulverize.
- Clean pop-up components and overflow: hair often collects where the pop-up meets the overflow channel; remove and rinse those parts.
- Flush mechanically removed debris: hot water flush and a cup of baking soda/vinegar followed by hot water clears residual soap film and helps grease-free rinsing.
- Routine: install a low-profile hair catcher and clear it weekly; silicone models catch more hair but need frequent cleaning.
Practical limitation: Mechanical methods are the right first move, but if you repeatedly snake and the clog returns within weeks, the problem is usually a downstream buildup or a collapsed section trapping hair. Re-snaking temporarily compacts the mess and creates false confidence.
Concrete example: In an Irvington bungalow we serviced, the homeowner fixed a slow tub with a Zip-It several times. When the clog returned every month we performed a camera inspection, found a hair-and-soap mat lodged at an offset joint in the cast-iron stack, and cleared it with targeted hydro-jetting. That stopped the recurrence until the homeowner installed a permanent trap filter.
When to call a licensed plumber
- Multiple fixtures slow or gurgling: likely beyond the P-trap and needs camera scope to locate.
- Recurring clogs after mechanical cleaning: indicates downstream buildup, offset joint, or damaged pipe.
- Foul sewer smell that returns: professional inspection to rule out partial sewer breach or biofilm growth.
- If you want long-term clearing: hydro-jetting is effective but should be preceded by a camera inspection to avoid damaging old joints.
Local note and next step: In older Portland houses, cast iron stacks and offset joints are common failure points; if you need inspection or service schedule a licensed tech through Portland Plumbing Services | River City Plumbing. For technique reference, see This Old House guide.
3. Running Toilet and Flapper Problems
Concrete point: A single deteriorating flapper is one of the easiest, cheapest plumbing fixes that still leaks the most water. A toilet that runs continuously can waste hundreds of gallons in a week and push up your water bill noticeably.
Quick diagnosis and common causes
- Symptoms: continuous hissing or trickle into the bowl, intermittent phantom flushes, or the fill valve cycling on and off.
- Typical causes: degraded rubber flapper or warped seat, chain too tight or too slack, mineral-crusted flapper, incorrect float height or failing fill valve, or a cracked overflow tube.
- Portland nuance: older low-flow or vintage toilets often use nonstandard flapper shapes; aftermarket parts may not seal well. Hard water mineral buildup in our region accelerates rubber decay.
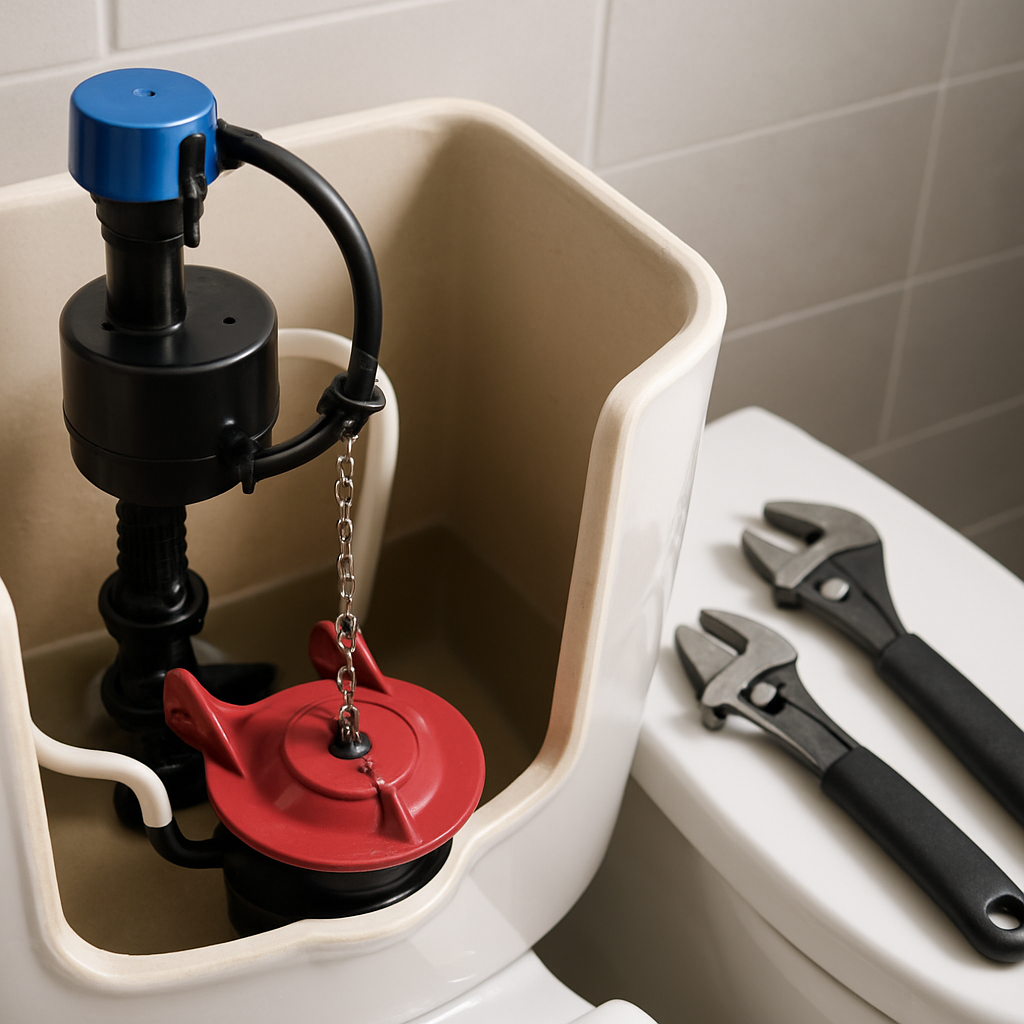
Practical DIY steps – what to try yourself: Turn off the toilet supply, remove the tank lid, and perform a visual test with food coloring in the tank – if color seeps into the bowl within 10 minutes you have a leak past the flapper. Replace the flapper with a modern aftermarket unit such as Fluidmaster 502 or a model matched to your tank, and set the chain with one or two inches of slack so it seats fully but does not tangle. If the tank never stops filling, check and adjust the float or replace the fill valve (example part: Fluidmaster 400A).
- Shut off supply and drain the tank before touching parts.
- Inspect flapper seat for grooves or buildup; clean with a nonabrasive pad.
- Install replacement flapper and test with the food coloring method.
- Adjust chain length and float height so water stops about 1 inch below the overflow tube.
- Replace the fill valve if tank keeps topping off despite a new flapper.
When not to DIY: If the flapper is fine but the tank continually fills, or if multiple toilets in the house behave the same way, stop and call a licensed plumber. Repeated fix-and-fail after parts swaps often means a misaligned seat, corroded tank components, or supply pressure issues that need professional diagnosis.
Concrete example: A homeowner in Southeast Portland noticed phantom flushing and a 15 percent spike in their bill. They replaced a brittle flapper with a Fluidmaster 502, adjusted the chain, and the running stopped immediately. In a second case, running recurred until the fill valve was replaced because the original valve float no longer seated under pressure.
Trade-off to understand: Cheap universal flappers are handy, but they do not always seat correctly on older or nonstandard tanks. Spending $20 to $40 on a quality, matched kit often avoids repeat calls. If you are already replacing multiple components, consider a single kit replacement to eliminate part-compatibility guesswork.
Practical judgment: Avoid temporary fixes like cramming towels or using adhesives on a bad seat. They mask the issue, invite leaks behind the wall, and almost always lead to a second service call.
4. Leaking Faucets and Minor Fixture Leaks
Straight fact: a persistent drip is one of the most frequent plumbing issues and a reliable early warning that seals or cartridges are failing. Minor fixture leaks waste water, raise bills, and usually point to worn internal parts – not the mains – but they can hide larger problems under the sink or inside the wall if ignored.
DIY checklist – safe, practical steps
- Isolate the fixture: close the sink or basin supply stop and run the faucet to drain residual water; use a small bucket under the P-trap to catch drips.
- Tools and parts: have a ___CODE0, CODE1___, replacement cartridge or O-rings (match the brand like Moen or Delta), plumber grease, and Teflon tape for threaded connections.
- Inspect and replace: remove the handle, inspect the cartridge and O-rings for scoring or mineral buildup, replace the cartridge if damaged, lubricate new O-rings with plumber grease, reassemble and test.
- Check supply lines and connections: tighten compression nuts gently; replace braided flex lines if frayed or corroded rather than chasing a seal failure.
- Do not attempt: force-saw or solder on corroded copper or steel in tight spaces, or try to repair a leak that comes from inside the wall without professional leak detection.
Practical tradeoff: repairing a faucet makes sense when high-quality parts restore reliable operation; cheap fixtures often reach a cost crossover where replacement is cheaper and faster. Ceramic cartridges and ball-valve assemblies last longer than older compression-style faucets, so factor fixture age and finish matching into the repair versus replace decision.
Concrete Example: a homeowner in Southeast Portland had a steady kitchen-spout drip. Replacing the Delta cartridge took about 30 minutes and stopped the waste. During reassembly the supply line blew out because of underlying corrosion, which required a pro to replace the line and check the shutoff valve.
Hard judgment you need to hear: when you find heavy corrosion, brittle supply lines, or a leaking valve at the wall, do not press on. Amateur fixes on corroded fittings often convert a small repair into a cabinet flood and a larger service call. In those cases call a licensed plumber who can safely replace supply lines, repair wall penetrations, and advise on longer term fixture replacement.
A single drip per second can waste roughly 3,000 gallons per year, so small leaks have real cost and damage consequences.
5. No Hot Water or Water Heater Failure
Key point: A sudden loss of hot water is often fixable quickly, but a leaking tank or persistent temperature swings mean the unit is failing and needs professional attention.
Symptoms, likely causes, and what you can check safely
- Symptoms: no hot water, only luke-warm water, hot water runs out quickly, loud rumbling, discolored water from the hot tap
- Common causes: failed heating element (electric), pilot outage or faulty thermocouple (gas), sediment buildup reducing capacity, corroded tank or failed T&P valve, broken dip tube or thermostat
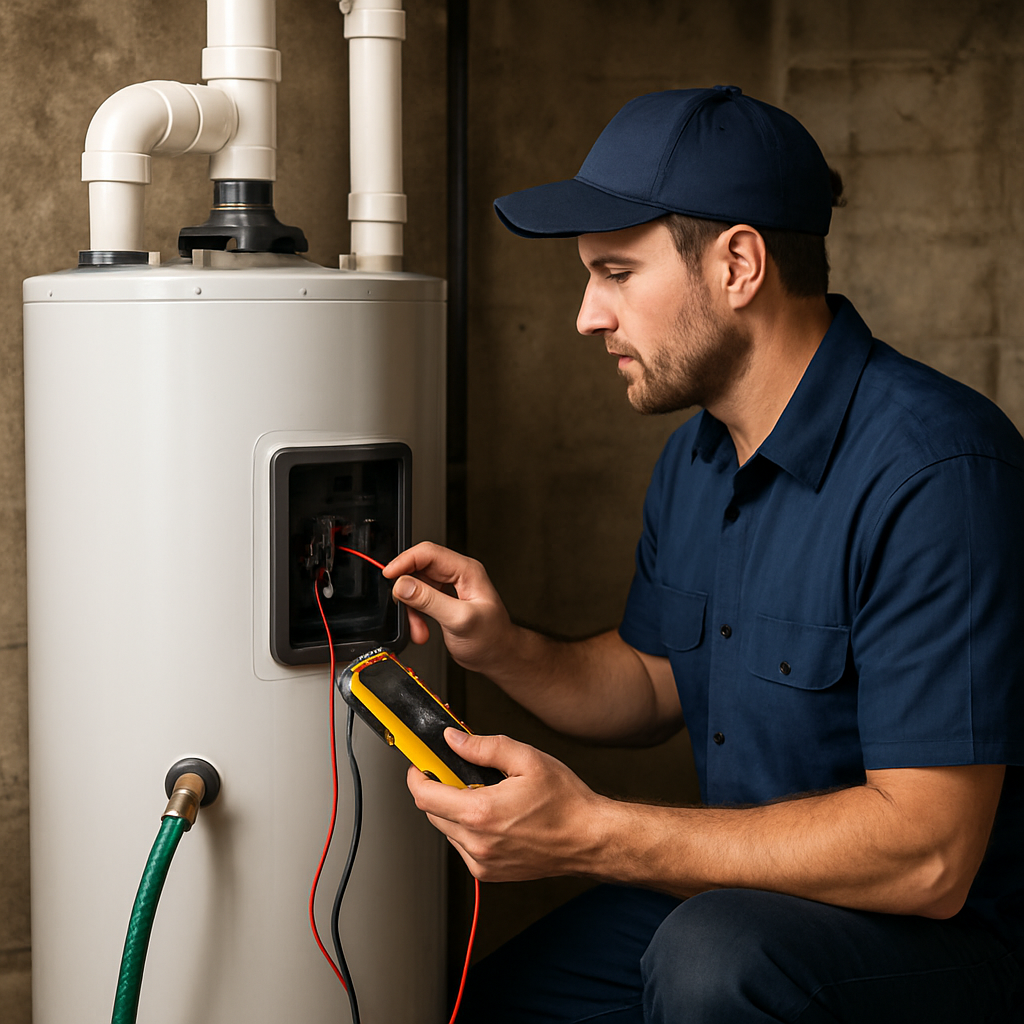
- Safe DIY checks: flip the water heater circuit breaker, check pilot indicator/igniter on gas models, press/reset the red
resetbutton on electric units, feel the hot and cold inlet pipes for temperature drop, flush the tank with a garden hose if you can safely drain it
Trade-off to consider: Flushing a tank removes sediment and often restores capacity, but repeated flushes only postpone the inevitable if the anode rod is spent or the steel is corroded. Flushing is low-cost maintenance; replacing a failing tank is an investment that stops recurring service calls.
When not to DIY: If the tank is leaking, you hear continuous water under the unit, you smell gas, or you need to touch fuel lines or venting. Gas-line and venting work, T&P valve replacement, and full unit swaps require a licensed plumber and often a City of Portland permit.
Real-world example
Concrete Example: A homeowner in Southeast Portland reported cold showers after a weekend outage. A quick check showed the breaker had tripped; resetting restored hot water. Two months later the unit made rumbling noises — sediment had settled and the tank lost efficiency, so they scheduled a replacement with a licensed plumber to avoid repeat failures.
Practical insight: Tankless systems solve the storage-capacity problem but trade simplicity for maintenance. In Portland, mineral scale from local water and frequent low-flow demands mean tankless units need routine descaling and correctly sized gas or electrical service. If you choose tankless during a remodel, budget for proper venting and a licensed install — see our Remodel & New Construction page.
- Cost ranges: simple repairs (elements, thermostats) $150–$450; tank replacement $700–$2,000 for conventional tanks; high-efficiency or heat-pump water heaters $1,500–$3,500; tankless installs often $1,500–$3,500+ depending on gas line or panel upgrades
- Time-to-fix: basic diagnostics and minor repairs in 1–3 hours; full replacement typically takes a day plus permit processing when required
- Portland note: check for local rebates and permit needs via the City of Portland and consult a licensed plumber for gas-water heater swaps
If you see water pooling, corrosion, or smell gas — shut off supply and call a pro immediately.
6. Burst Pipes and Cold-Weather Pipe Bursts
Key point: Portland cold snaps rarely last long, but when nights drop below freezing they reveal weak links in old plumbing. Frozen sections give and fail fast—often at joints, near uninsulated walls, or where a pipe runs against a cold exterior wall.
- Immediate actions (stop the damage): shut off the house shutoff valve, open faucets to relieve trapped pressure, and move furniture or valuables out of the water path.
- Containment steps you can do now: collect water with buckets and towels, catch leaks with a pan under the breach, and shut off electricity to wet areas if water is contacting outlets or fixtures.
- Do not do: attempt soldering, hammering, or cutting hidden pipes yourself; thawing frozen pipes with open flame or concentrated heat risks fire and split joints.
Practical limitation: short-term fixes like pipe clamps, rubber and hose-clamp repairs, or a cuff of rubber and hose clamps will stop many accessible leaks temporarily but they are not permanent. Expect a temporary patch to hold until a licensed plumber does a proper splice or replacement.
Prevention trade-offs and what really works
Trade-off: insulation is cheap and effective but only where you can reach pipes. Heat tape or thermostatically controlled cable works inside tight spaces and on exterior runs, but it uses power and can fail if installed incorrectly. For long-term reliability in older Portland houses, the best strategy is targeted insulation plus rerouting or replacing exposed galvanized or original copper where freeze risk is recurring.
Concrete example: A Northeast Portland homeowner found a burst on a 3 4 inch copper line in an unheated attic after a one-night freeze. They shut the main, collected water, and used a temporary clamp. River City Plumbing arrived, cut out a 2 foot section, soldered a replacement piece, and checked the attic insulation and ventilation. The repair took 3 hours; drywall repair and ceiling repainting were handled separately by a contractor.
Judgment call homeowners miss: many assume a single clamp solves the problem. In my experience a clamp is a stopgap. If the pipe burst because of corrosion or repeated freezing, nearby sections are likely weakened. Budget for a short inspection and partial re-pipe when a burst occurs, not just the visible repair.
Takeaway: treat any cold-weather burst as both a plumbing and an insulation failure – patch now, inspect and repair properly soon, and add insulation or reroute vulnerable runs to avoid repeat emergencies.
7. Sewer Line Backups and Tree Root Intrusion
Straight talk: when multiple fixtures back up or you smell sewage in the yard, you are almost always dealing with a main sewer issue — in Portland that usually means root intrusion or failing clay/cast-iron pipes, not a simple P-trap clog.
What actually causes these backups
- Tree roots: mature street and yard trees are drawn to tiny leaks and joint gaps in older lines and will invade and expand inside the pipe.
- Structural failure: old clay or cast-iron lines can collapse, offset, or corrode, creating low spots where solids collect.
- Accumulation: grease, wipes, and debris that resist disintegration combine with roots and rough pipe interior to cause persistent blockages.
Immediate homeowner limitation: avoid running water or flushing multiple fixtures once you suspect a main sewer backup — that only worsens basement overflows or yard sewage. Do not dig or attempt a permanent repair yourself; main lateral work usually requires permits and coordination with city crews.
What to do and when to call a pro
- Short-term: stop nonessential water use, contain backups with sandbags or totes, and call an emergency plumber if sewage is in the house.
- Diagnosis (call a pro): insist on a camera scope — it costs less than repeated snaking and tells you whether hydro-jetting, pipe lining, or replacement is appropriate.
- Repair choices and trade-offs: hydro-jetting clears roots and buildup cheaply but does not stop regrowth; cured-in-place pipe lining avoids excavation but can fail if the pipe is collapsed or has severe offsets; full replacement is the only fix for structurally failed lines and costs more and requires permits and excavation.
Practical judgment: homeowners waste money when they accept repeated augering without a camera inspection. In practice, camera-first cuts long-term cost and avoids unnecessary hydro-jetting when the line needs replacement.
Concrete example: a Southeast Portland bungalow with mature maples had quarterly snaking for two years. A camera inspection showed a partially collapsed clay joint invaded by roots. River City Plumbing hydro-jetted and then installed a short cured-in-place liner over the worst section — this cost substantially less than full tear-out and bought five to ten years before full replacement, but the owner also installed a root barrier and moved future plantings farther from the lateral.
Portland-specific notes: time and cost are affected by street access, driveway removal, and City permits. Check local utility advisories before excavation and consult the City of Portland Water Bureau for guidance on service-line responsibilities and permit links.

Final consideration: hydro-jetting is a useful tool, not a permanent cure when roots or structural failure are present. Plan repairs with long-term prevention in mind: targeted lining, root barriers, or replacement paired with landscape changes.
8. Low Water Pressure and Municipal vs. Private Issues
Straight fact: low water pressure is either a supply problem outside your property or something inside the service path to fixtures, and telling the difference saves you time and money.
How to quickly triage pressure problems
- Check multiple fixtures: if only one faucet is weak, the issue is fixture or localized piping. If the whole house is weak, suspect the service line, PRV, or municipal supply.
- Compare with neighbors: ask a neighbor or check at an outdoor
hose bib; if they report the same drop, it is likely municipal and you should check City of Portland Water Bureau advisories before calling a plumber. - Measure pressure: attach a mains pressure gauge to an accessible hose bib or irrigation spigot. Normal operating range for most Portland homes is roughly 40 to 60 psi. Readings under 40 psi are low; readings over 80 psi risk fixture damage.
- Inspect the PRV and main shutoff: if your house has a pressure reducing valve near the meter, small leaks, corrosion, or failure here will cause whole-house low pressure.
Practical tradeoff: replacing a failing PRV is often the correct fix and restores consistent pressure, but if your house sits at 20 psi because of a narrow, corroded service line you may need service-line replacement which is expensive and requires permits. A booster pump can mask a restricted private line but it does not fix a corroded or lead service line and can complicate future replacement and backflow prevention.
Concrete example: a homeowner in Southeast Portland reported weak showers in the evening. Pressure gauge showed 28 psi at the hose bib and neighbors had normal pressure. River City Plumbing found a partially seized PRV and replaced it for about $650, restoring full pressure. In another case, a cluster of homes on the same block lost pressure during a Water Bureau main repair; no plumber work was needed.
When to call a plumber
- Call a pro if: whole-house pressure is low and neighbors are fine, your pressure gauge reads below 40 psi, or you suspect the private service line is corroded or leaking.
- Call a pro if: the PRV is inaccessible, leaking, or you want it replaced with a pressure regulator with testable shutoffs and a by-pass.
- Do not rush to install a booster pump without confirming the private service line and backflow arrangements; a plumber will advise the correct sequence and necessary permits.
Next step: if your own checks point to a private issue, schedule a professional inspection through our Portland Plumbing Services so the technician can test pressure, inspect the PRV and service line, and advise on repair versus temporary fixes like a booster.
Judgment: homeowners often waste money on booster pumps when a simple PRV replacement or a seized curb stop is the real problem. Test first, then spend.
9. Hidden Leaks, Wall Leaks, and Slab Leaks
Hidden leaks are the slow, expensive failures homeowners ignore until they become emergencies. An unexplained spike in your water bill or a damp patch behind drywall is often the first clue — by then the leak has usually been running for days or weeks.
Detecting a leak before demolition
Practical first checks: shut off all water, note the meter reading, wait 15–30 minutes and recheck the meter; if it moves, you have a leak. Walk the house for new stains, musty odor, or warm spots on a slab floor. Use a moisture meter or borrow/rent a thermal camera before punching holes in walls.
- Safe DIY isolation: turn off fixtures one at a time to see if the meter stops — this narrows the zone of the leak.
- What not to do: avoid cutting drywall or drilling into a slab based on a hunch; premature demolition increases repair scope and cost.
- When to document: take photos of stains and meter readings for insurance and to show a plumber.
Detection methods professionals use (and why it matters)
Plumbers combine methods because each has limits. Acoustic listening picks up flowing water in walls but struggles with noisy homes. Thermal imaging shows temperature differences but can miss slow cool leaks. Tracer gas and video pipe scopes locate leaks under slabs or behind finishes with the least collateral damage.
- Acoustic leak detection: fast and noninvasive; best for pressurized pipe leaks in ceilings and walls.
- Thermal camera: quick scan for warm/cool anomalies; useful after a hot-water leak but gives false positives around HVAC.
- Tracer gas and camera: higher-cost, higher-precision tools for slab leaks and sewer line issues; usually required for accurate repair planning.
Repair approaches and the trade-offs you'll face
Spot repair vs reroute vs re-pipe: a spot repair under a slab is cheapest short-term but often fails if the pipe corrodes elsewhere. Rerouting pipes above slab adds price but lowers future risk and avoids cutting concrete. Whole-house re-pipe is the most expensive up-front but ends repeated repairs and raises resale value.
| Repair Type | Typical Portland Cost Range | Pros | Cons |
|---|---|---|---|
| Spot slab patch | $1,000 – $3,000 | Least disruptive initially | May be temporary if pipes are old |
| Reroute above slab | $3,000 – $8,000 | Reduces future slab work, easier access | Higher finish repair costs (floors, cabinetry) |
| Full re-pipe | $4,000 – $15,000+ | Permanent solution, improves pressure and water quality | Highest short-term cost and requires time/permits |
Portland-specific consideration: older homes in neighborhoods with mature trees and shifting soils are more likely to have buried pipe movement and joint failures. City permits are often required for significant water-service changes — check with the City of Portland Water Bureau and hire a licensed contractor who handles permits and inspections.
Concrete example: A Southeast Portland homeowner noticed a $150 jump in monthly water use and a warm spot in the bathroom tile. River City Plumbing used acoustic testing and a thermal camera to pinpoint a leaking copper elbow under the slab, performed a targeted tunnel repair, and rerouted the hot supply to avoid future breaks — cost was mid-range but avoided full slab demolition.
Key judgment: chasing the cheapest quick patch usually costs more in the next 12–24 months; invest in proper diagnosis and choose a repair path that matches pipe age and home plans.
10. Corroded, Galvanized, or Outdated Piping and Retrofit Needs
Straight talk: older galvanized, lead, or mixed-metal piping rarely improves with spot repairs—it degrades from the inside out, so small leaks, rusty water, and falling pressure are symptoms, not one-off problems.
Assessment steps a licensed plumber will run (and what you can check first)
- Quick homeowner checks: inspect exposed supply lines under sinks and in basements for flaky rust, test a faucet aerator for brown sediment, and note whether discoloration shows across multiple fixtures.
- Professional inspection: a plumber will identify pipe material (magnet test for galvanized), take water samples if lead is suspected, and map the system to show which runs feed critical rooms.
- When service line matters: if records or a test suggest a lead service line, coordinate replacement with the City of Portland Water Bureau; do not attempt to remove a service line yourself (City of Portland Water Bureau).
Concrete example: A 1920s Irvington bungalow had intermittent brown water and low pressure. River City Plumbing scoped accessible runs, confirmed galvanized feeds to the kitchen and laundry, and recommended a phased repipe to PEX: kitchen and laundry first, bathrooms during the next remodel. The staged approach cut immediate disruption and kept the total replacement within the homeowner's cash flow.
Trade-off to accept: full repiping costs more up front but stops recurring leaks and water-quality risks. Patching galvanized lines or mixing new copper onto old galvanized often causes galvanic corrosion at transition points; dielectric fittings help, but they are a workaround, not a long-term fix.
Material choices and practical limitations
- Copper: durable, heat-tolerant, higher material cost; good where exposed and for long runs with few bends.
- PEX: low cost, faster install, flexible for retrofit work and quiet; avoid UV exposure and follow local code for potable water.
- CPVC: less common for new installs in Portland; brittle over time compared with PEX.
- Mixing metals: requires dielectric unions and careful planning. In practice, a single-material repipe reduces callbacks and simplifies future repairs.
Judgment call most homeowners miss: sellers and DIYers often prefer piecemeal fixes to hide costs. That saves money today and creates higher long-term expense and property risk. If your home is older than 1960 and you have recurring leaks or discolored water, budgeting for a whole-house or phased repipe is usually the more cost-effective, lower-risk choice.
Next step: schedule a licensed inspection to get a materials map and a staged replacement estimate — that one decision prevents repeat plumbing repairs, unexpected failures during remodels, and water-quality liabilities down the road.